Did you know you can share your availability and propose times to meet directly in Gmail? Yes, without switching tabs or opening another window!
If Google Workspace apps are your jam and you use Google Calendar and Gmail, listen up! This feature makes back-and-forth communication a breeze, but it’s hidden, which means you need to know where to find it if you want to use it. Keep reading to learn how to schedule a meeting fast!
Introduction to Gmail’s scheduling feature
In case you missed it, Gmail introduced a new meeting scheduling feature in 2023. Now, Gmail users have better options for scheduling meetings when composing emails, reducing the amount of tab switching involved in previously checking one’s calendar. Essentially, the feature provides an easy way to add a meeting to the calendar, create an event, or offer times when you’re free.
Setting up Gmail meeting scheduling
Setting up the new meeting scheduling feature in Gmail is simple. Here’s how it works.
Accessing the Scheduling Feature
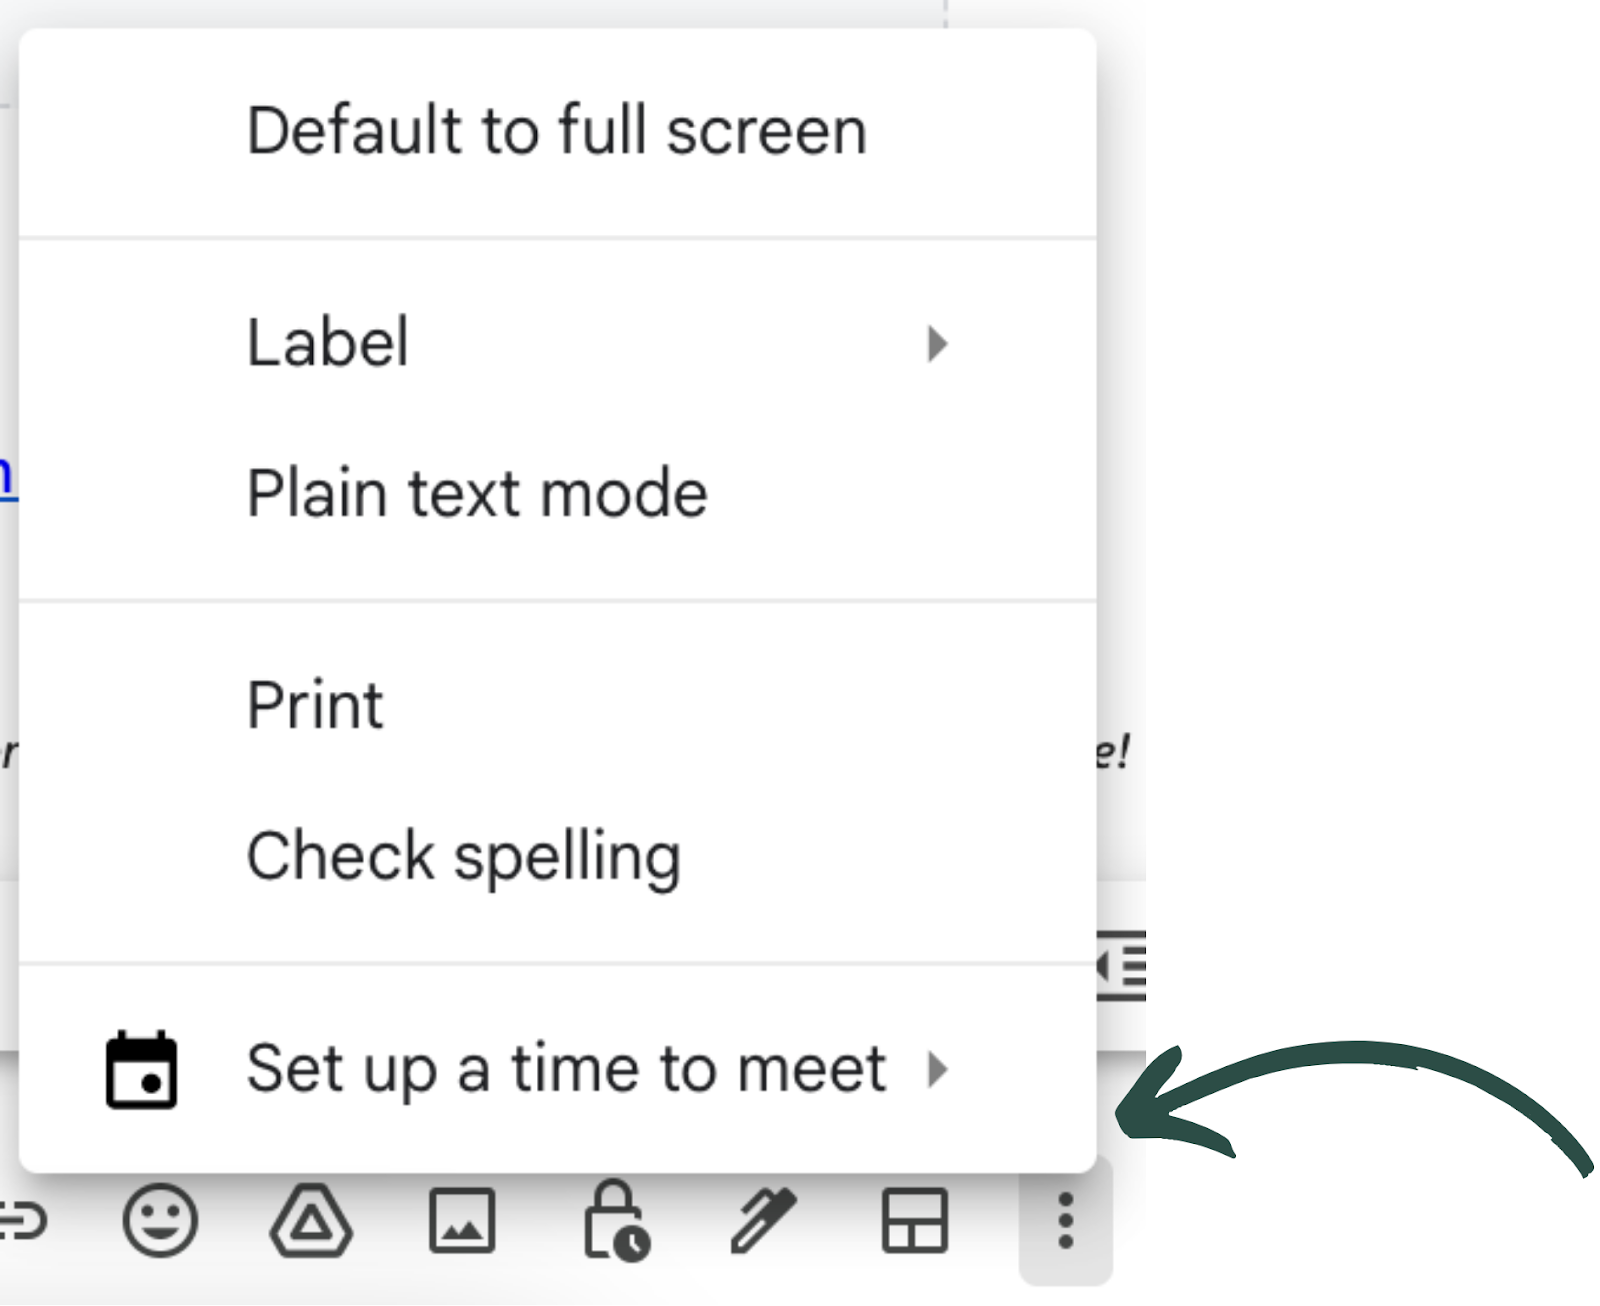
To access the new scheduling feature, all you have to do is start a new email or reply to a thread in Gmail. Then, you’ll either click the calendar icon or, if you can’t see it, the three dots (More options) button, both in the bottom menu of your message like this:


Easy to find and even easier to use! (More on that next.)
Linking your calendar
For work (and school) accounts, admins control access to Google Calendar, so if you don’t have the option to schedule events in Gmail, you’ll need to contact an administrator.
Otherwise, this feature is linked to the Google Calendar and your Google account, so there aren’t any additional steps to link it. Adding events is only possible on your main calendar; you cannot add events to any other calendars you have created or ones others shared with you.
Creating a meeting invitation
So you know where to find the feature, but now you want to know how to use it. Follow these steps!
Step-by-step instructions for creating a new meeting
1. Click the calendar icon in your email to open the meeting scheduling feature.
2. Select “Set up a time to meet” and “Create an event.”
3. A new event will open in the right-hand sidebar.
4. Enter your event details, including a Google Meet link (optional) for a video meeting, save it, and you’re all set!
And there’s another easy way to do this! If someone sends you an email and you want to create an event based on the details of their email, you can simply:
1. Open an email in your inbox and look for the three dots (More options) menu at the top of your message.
2. Select “Create event.”
3. The calendar event will auto-populate with the details from the email, so this method works great if someone emails you with a subject line like, “Coffee at 10 am?”
Customizing meeting details
When you create a new event in Gmail, you can still customize your calendar invite meeting details, including:
- The name of the event
- The location of your meeting
- Adding a Google Meet video conference link
- An event description
- The visibility of the event
- A notification reminder
You can open the calendar event in a new tab for further customization options if needed.
Once you save the invitation, Google will add a summary of the event to the body of your email.
Step-by-step instructions for offering available times to meeting participants
1. Click the calendar icon in your email to open the meeting schedule feature.
2. Select “Set up a time to meet” and then “Offer times you’re free.”
3. Click available times in the calendar pane or add them manually.
4. Add your event title, duration, and details (video conferencing and description).
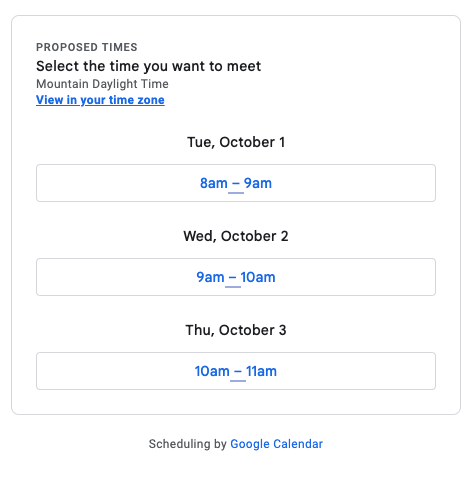
5. Add the proposed times to the body of your email, and you’re all set!

Some important details to note about this feature:
- This feature only works for 1:1 meetings, so if you send a proposal to multiple people, only the first person to book with you will be added to the event, and you must add additional participants separately
- When a recipient chooses a time to meet with you, Google automatically creates the event and adds it to your calendar
- The proposed times are displayed in the event creator's time zone, and the times on the booking page are shown in the recipient's time zone
Managing scheduled meetings
Here are some essential tips for managing scheduled meetings.
Editing and canceling meetings
Deleting an event summary from the body of your email doesn’t delete it from your Google Calendar. If you want to cancel a meeting, you must go to your Google Calendar and handle it there.
While you can create new Google Calendar events and share your availability with the scheduling feature, we find it best to edit and cancel meetings in Google Calendar directly (or use Clockwise to edit and cancel your meetings instead).
Sending reminders
You can get notifications on your phone, computer, or email to remind you about upcoming events. The best part is that you can customize notifications for single events or specific calendars.
If you make changes to your notification preferences, they won’t affect anyone else on the calendar event.
Toggle these options on or off:
- For alerts and desktop notifications: Click “Settings” in the top right corner of your Google Calendar and select “Notification settings.”
- For emails and desktop notifications: Click the calendar you want to turn notifications on or off under “Settings for my calendars.”
- For individual events: Click the event and “Edit event” to find “Notifications.”
Tips for effective scheduling with Gmail
Google offers additional features to simplify scheduling in today’s complex environment.
Time zone management
Google offers several ways to manage time zones when scheduling meetings in Gmail, including:
- The ability to change the time zone of an event if you want to create one in a time zone other than your own
- A world clock feature that allows you to view multiple time zones at once
Here’s how to enable the world clock:
1. Open Google Calendar on your desktop browser.
2. Click “Settings” in the top right corner and select “Show world clock.”
3. Add the time zones you want to see!
Finally, you can add a secondary time zone alongside your primary one if you frequently schedule meetings in the same time zone. To do this,
1. Open Google Calendar on your desktop browser.
2. Click “Settings” in the top right corner and select “Time zone.”
3. Check the box next to “Display secondary time zone.”
4. Add the time zone, and you’re ready!
Integrating with other tools
Gmail and Google Calendar offer various integration options to simplify scheduling and coordination hassles. You can connect your Google Calendar (also available for Microsoft Outlook users!) to Clockwise and customize your calendar how you want, ensuring you have enough time for meetings and tasks. You can also create Scheduling Links for stress-free meeting scheduling. (With the Clockwise Chrome extension, you can quickly create or copy these links into your email to share your availability!)
Troubleshooting common issues
Technology isn’t perfect, but calendar issues can cause significant problems, from missing essential meetings to unintentional double bookings. If you’re running into syncing challenges or notification issues, start here.
Syncing problems
If you’re running into issues where events you have created or updated aren’t showing up correctly, there are a few things you can do to troubleshoot, including:
- Double checking which calendar you are adding events to, ensuring it’s the right one where you want to see the events appear
- Updating your Google Calendar app if you are adding events to your calendar using your mobile device
- Checking your Internet connection
If things still don’t look right, here are some additional steps you can take.
Notification issues
Are you having notification issues and receiving a “Browser doesn’t support notifications” error? No problem! Try:
- Popping into your notification settings to ensure they are turned on
- Making sure you’ve enabled the proper settings in your browser if you want to receive web browser notifications (or turn on desktop notifications if you won’t be using your browser)
For more help with notifications, try this Google Calendar Help article.


.gif)
.png)


