
Setting up a meeting with external participants involves more than just sending out an invite. It requires precise configuration of your Microsoft Teams environment to ensure secure and effective collaboration.
Microsoft Teams has become a leading platform for virtual meetings, with over 270 million active users worldwide, making it a powerful tool to connect both internal and external team members.
However, to get the most out of it, you need to know how to schedule a Teams meeting with external users properly. This blog simplifies the process, covering key steps such as configuring external access, customizing meeting options for security and interaction, scheduling and inviting participants, and ensuring all technology is ready for a smooth meeting experience.
Let us start by understanding how to enable external participation.
Enabling External Participation
Before you can start scheduling meetings with external participants, it’s essential to ensure that your Microsoft Teams environment is configured correctly to allow external guests. This setup is crucial as it impacts who can join your meetings and what permissions they have once they join.
1. Checking and Adjusting Microsoft Teams Admin Settings
The first step is to verify your Teams settings to make sure external participation is enabled. This process involves:
- Accessing the Microsoft Teams admin center: You need to log in with admin credentials at the Microsoft Teams admin center. Here, you can manage all settings related to meetings and guest access.
- Navigating to external access settings: Within the admin center, look for 'External Access' or 'Guest Access' settings. These options control the ability of external users to access your Teams environment.
- Enabling external access: Ensure that the settings allow for external users to participate in meetings. You may choose to enable communication with external domains and configure what level of access external guests should have.
2. Configuring Meeting Settings to Ensure Guest Participation
After ensuring that external access is enabled, the next step is to configure specific meeting settings to facilitate a smooth experience for external guests:
- Meeting invitations: Customize meeting invitations with all the necessary details. Ensure that the invitation includes a link to join the meeting, which can be used by external participants without requiring them to sign into Teams.
- Meeting options: Prior to sending out invitations, set up meeting options by selecting the appropriate choices under 'Meeting Options' within the Teams app. Here you can decide who can bypass the lobby, who can present, and whether attendees can unmute themselves.
- Advanced features: Consider enabling features like live captions and meeting recordings, which can upgrade the meeting experience, especially for external participants who may need them.
Now that we've set the stage for external participants to join your Microsoft Teams meeting easily, let's get into how to actually schedule those meetings effectively.
Scheduling the Meeting in Teams

These are the straightforward steps to ensure an effective meeting setup every time with external participants.
1. Opening the Teams Calendar and Creating a New Meeting
Kick-start your meeting setup by accessing the Microsoft Teams calendar, where you can easily schedule new meetings tailored for external and internal participants alike. Here is how to do it in simple steps:
- Open Microsoft Teams: Start by launching the Microsoft Teams application on your device.
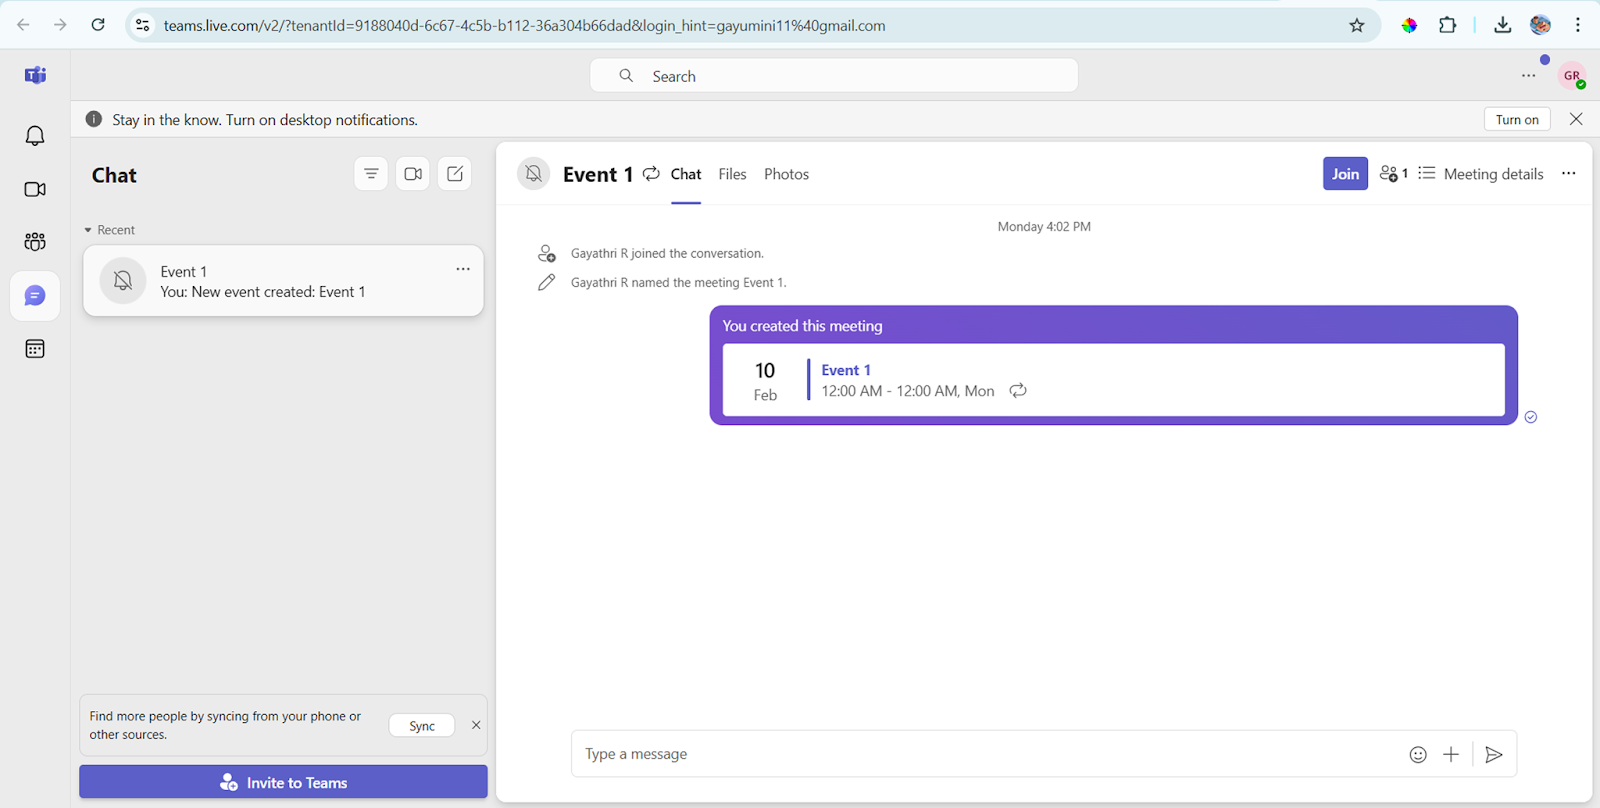
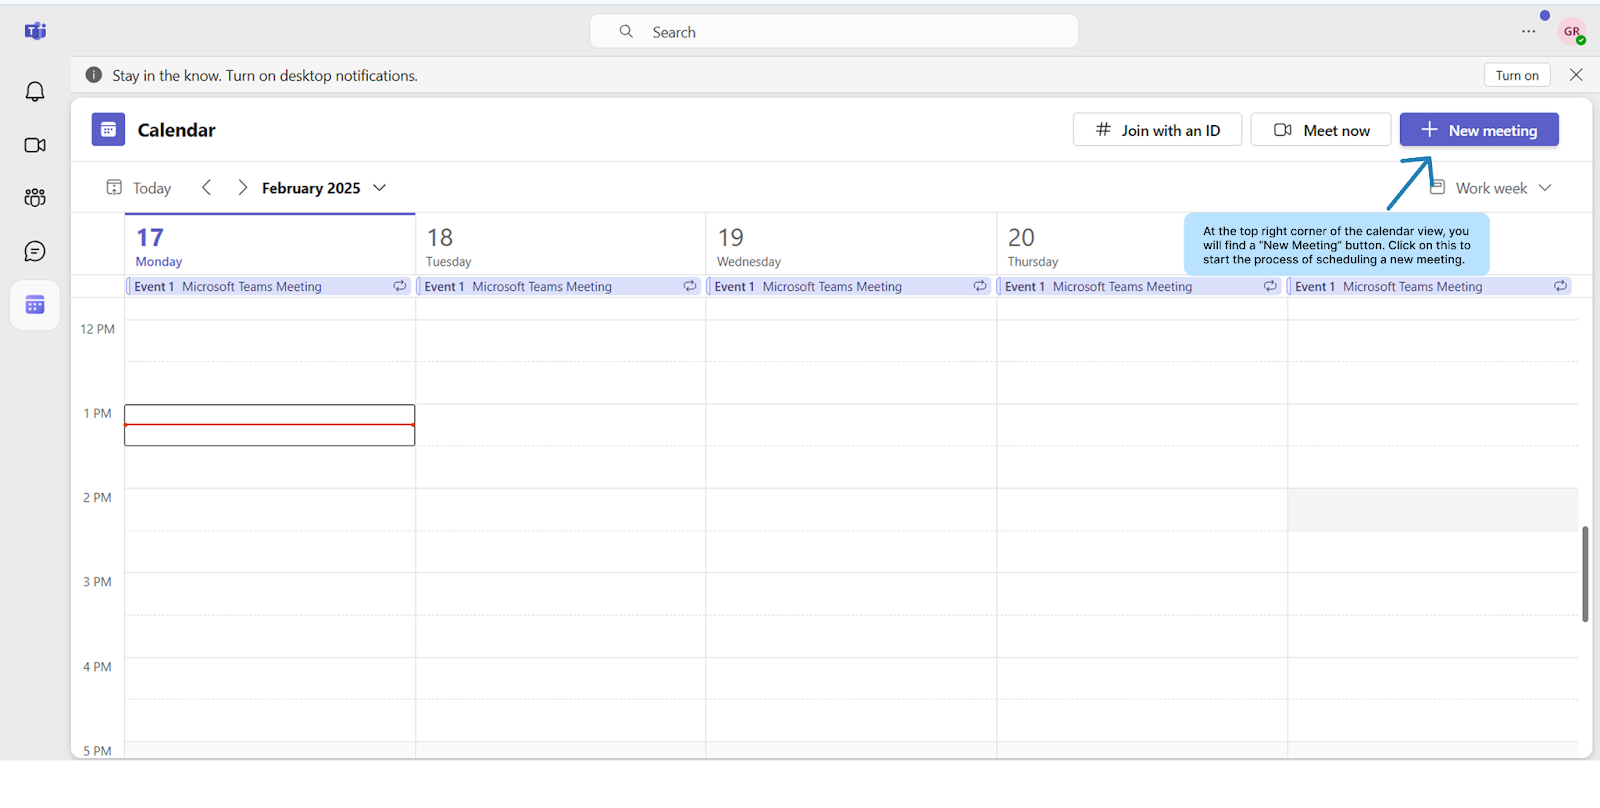
- Access the Calendar: Go to the Calendar tab on the left-hand side of the Teams interface. This will display your current calendar of events.

- Schedule a New Meeting: At the top right corner of the calendar view, you will find a “New Meeting” button. Click on this to start the process of scheduling a new meeting.
2. Filling in Meeting Details

Detail your meeting with a clear title, set the perfect time considering all time zones, and outline the agenda to set clear expectations for all attendees.
- Meeting Title: Enter a concise yet descriptive title for your meeting. This will help attendees understand the purpose of the meeting at a glance.
- Date and Time: Specify the start and end times for the meeting. Ensure that the timing is suitable for all participants, especially considering different time zones if applicable.
- Meeting Description: Provide a detailed agenda or description of the meeting. This helps set expectations and allows participants to prepare adequately in advance.
3. Adding External Attendees
Effortlessly add external participants by inputting their email addresses in the attendee field, allowing Teams to handle the invitation process smoothly.\
- Add Attendees: In the “Add required attendees” field, you can start typing the names of your internal team members to add them to the meeting. For external participants, enter their full email addresses. Teams will recognize these as external users and send them an appropriate invitation.
- Send Invitations: Once you have added all participants, click “Send” to distribute the invitations. External participants will receive an email with a link to join the meeting, regardless of whether they have a Teams account.
With your meeting participants lined up and the schedule set, let’s move on to how you can tailor the meeting settings to ensure everything runs smoothly for everyone involved.
Customizing Meeting Options
Customizing meeting options in Teams is essential for maintaining a productive, secure, and organized session. Below, we’ll cover how to fine-tune your meeting options to create the ideal environment for your session.
1. Setting Meeting Options
Customize your meeting's security and interaction settings to fit the needs of your session, enhancing control and focus during the discussion.
- Access Meeting Options: After creating your meeting, click on the meeting entry in your calendar and select “Meeting options.” This allows you to set specific parameters for participant interactions.
- Lobby Settings: Decide who gets to bypass the lobby. It’s often wise to allow external participants to wait in the lobby until admitted by the host, enhancing security and control over the meeting’s start.
- Presenter Roles: Determine who can present during the meeting. You can restrict presenting rights to yourself or select individuals to prevent unauthorized sharing and maintain the meeting's focus.
2. Customizing Meeting Invitations
Here is how to customize the meeting invitations with instructions:
- Add Instructions or Attachments: In the meeting invitation, you can include any pre-read materials or specific instructions for joining the meeting. This is particularly helpful for external participants who may be less familiar with Teams.
- Clarify Joining Process: Ensure that the invitation clearly explains how external participants can join the meeting, including what to expect if they are placed in a lobby.
When setting up meetings that include external participants, Clockwise's ability to analyze real-time calendar data to suggest the best meeting times is invaluable. This ensures that meetings are scheduled when participants are most attentive and engagement is likely to be high
Now that you've tailored the meeting settings for optimal security and communication, let's shift our focus to how you can effectively send out your invitations and manage responses to ensure everyone is prepared and informed.
Sending Invitations and Managing RSVPs
Effective meeting management starts with clear communication. Here’s how to send your invitations and monitor RSVPs to make sure your Teams meeting includes all the right participants.
1. Sending the Meeting Invite
Once your meeting is scheduled in Microsoft Teams:
- Send Invitations: After adding all participants and finalizing the meeting details, click the "Send" button to distribute the invites. This will automatically send an email invitation to all participants, including external guests, containing the meeting link and other relevant details.
- Confirmation: Participants will receive the invitation in their email, which includes the option to accept, tentatively accept, or decline the meeting. This helps you track who is likely to attend.
2. Managing RSVPs
Monitor and manage RSVPs directly from Teams, follow up with non-responders, and update meeting details as needed to keep all informed.
- Check Responses: You can view the RSVP status of all invited participants directly in the Teams Calendar. Open the meeting item to see who has accepted, declined, or not yet responded.
- Follow-Up: For key participants who have not responded, consider sending a gentle reminder via email or Teams chat to ensure their participation.
- Update Details: If there are any changes to the meeting time, date, or other details, update the meeting in Teams and resend the invites. All participants will be notified of the changes.
Clockwise enhances this process with smarter scheduling links. These links consider the best possible times for all participants, significantly boosting the likelihood of timely responses and higher attendance rates.
With your invitations sent and RSVPs managed, let’s now focus on the final preparations to ensure your meeting runs without a hitch.
Preparing for the Meeting
Efficient preparation sets the stage for effective meetings. Here’s how you can ensure everything is in place before your next Teams session begins.
1. Preparing Content
- Gather Materials: Prepare all necessary materials such as presentations, documents, and any other files that will be shared during the meeting. Ensure they are accessible and organized for quick sharing.
- Upload to Teams: Consider uploading any documents or presentations to the Teams meeting chat or associated channel beforehand. This allows participants to review materials in advance and can facilitate smoother presentation during the meeting.
When organizing meeting materials and schedules, Clockwise can be a game-changer. It automatically resolves calendar conflicts and optimizes scheduling, ensuring that all participants are available without the usual back-and-forth. This is particularly useful in avoiding overlaps and ensuring everyone is prepared and present for the meeting.
2. Conducting a Pre-Meeting Test
Ensure a flawless start by conducting a thorough pre-meeting test to check all technical setups, including audio, video, and internet stability, minimizing potential disruptions during your Microsoft Teams meeting.
- Test Audio and Video: Before the meeting, conduct a test of your audio and video setup. Use the "Device settings" in Teams to ensure your microphone, speakers, and camera are all working correctly.
- Check Internet Connection: Verify that your internet connection is stable and strong enough to support a video meeting. This is crucial to avoid disruptions during the meeting.
- Dry Run: If you're using new technology or complex presentations, consider doing a dry run with a colleague to ensure everything displays correctly and transitions smoothly.
To ensure all systems are a go before the meeting, Clockwise can pinpoint the optimal times for conducting pre-meeting tech checks. This ensures that these checks do not conflict with other commitments, paving the way for a smooth start to your meeting.
Now that your materials are ready and your tech is checked, let's move into how to effectively manage and host the meeting to ensure a smooth and productive session.
Hosting the Meeting

Hosting a Microsoft Teams meeting with external participants requires attention to both the technical setup and the meeting dynamics to ensure everything runs smoothly.
1. Starting the Meeting
Initiate your meeting confidently by joining early, welcoming attendees warmly, and managing the session dynamically to maintain engagement and order.
- Access Meeting Options: Open your Microsoft Teams Calendar and find the scheduled meeting. Click on the ‘Join’ button a few minutes before the scheduled time to ensure you are ready when participants arrive.
- Welcoming Participants: As the host, greet participants as they join, especially external guests who may be less familiar with Teams. This sets a friendly tone and can make external participants feel more comfortable.
- Managing Participants: Familiarize yourself with the participant management tools in Teams. You can mute or unmute participants to manage background noise and ensure that only the current speaker is heard. This is crucial in maintaining order, especially in larger meetings.
2. Utilizing Interactive Features
Use Teams' interactive tools like screen sharing, breakout rooms, and polls to enrich the collaborative experience and gather valuable feedback.
- Sharing Content: During the meeting, you may need to share presentations, documents, or your screen. Use the ‘Share’ icon in the meeting toolbar to select what you want to share. Make sure to pause for questions and clarifications to keep the meeting interactive.
- Breakout Rooms: For workshops or meetings where group work is needed, use the breakout rooms feature to divide participants into smaller groups. This can be particularly effective for brainstorming sessions or when discussing sensitive information.
- Polls: Engage participants and gather instant feedback by creating polls. This can be a quick and effective way to make decisions, gauge opinions, or stimulate engagement from all attendees, including those who might be quieter during meetings.
With your meeting now in full swing, let’s transition to optimizing your session with strategies that will ensure a successful meeting for all participants.
Tips for a Successful Meeting
Prepare thoroughly, communicate clearly, and manage the meeting adeptly to ensure productive outcomes and clear action steps post-discussion. Here are a few tips to help you set up a successful Teams meeting.
- Preparation: Make sure all the materials needed for the meeting are ready and open on your device before the meeting starts. This includes presentations, videos, or any external links you intend to share.
- Communication: Clearly communicate the agenda at the beginning of the meeting and stick to it to manage time effectively. Also, be clear about how and when participants can ask questions or contribute.
- Technical Checks: Continuously monitor the chat for any questions or technical issues that participants might be facing. Offer assistance to those having trouble with audio or video connections.
- Follow-Up: After the meeting, provide a summary of the discussion, any decisions made, and the next steps. Consider sharing a recording of the meeting if it was recorded, along with any relevant documents or actions items.
With these guidelines in place, your meeting can not only achieve its objectives but also leave participants clear about the outcomes and next steps. This structured approach ensures that every meeting you host is productive and meaningful.
Conclusion
Successfully setting up a Teams meeting with external participants requires careful configuration and planning. By following the steps outlined in this guide, from enabling external access in Microsoft Teams to customizing meeting options and managing RSVPs, you can ensure that your meetings are both productive and inclusive. Integrating these practices is key to mastering how to schedule a Teams meeting with external users effectively.
Clockwise is your ultimate ally in this process, offering advanced scheduling solutions that cater specifically to the dynamic needs of modern businesses. Its features not only save time but also enhance the overall scheduling experience.
Discover Clockwise for yourself and see how it can transform your approach to scheduling meetings.
About the author

Kacy is the VP of Marketing at Clockwise, where she's spent the last three years helping companies transform their approach to time management and team productivity. As a working mother of two, she brings both professional insight and personal experience to conversations about maximizing precious time. Kacy draws inspiration from thought leaders like Cal Newport, Jake Knapp, and Cassie Holmes, applying their principles to help modern teams work smarter. When she's not nerding out on calendar management techniques, you can find her striving to create balance and intentionality in her own life, both at home and in the office.
.gif)


