Calendar sharing is one of your most powerful tools for staying aligned as a team. Whether you’re tracking key project deadlines, managing out-of-office dates, or running a small business, a shared calendar acts as a single source of truth that team members can reference anytime. A shared calendar is a must-have for any team — and it’s incredibly easy to set up.
In this quick guide, we’ll show you two ways to create a shared calendar in Microsoft 365, previously called Office 365:
- Share a calendar in Microsoft Outlook (desktop, mobile, and web instructions included)
- Share a calendar in Microsoft Teams
Not a Microsoft 365 user? Read our guide about calendar sharing in Google Calendar. Otherwise, keep reading for the Microsoft instructions.
Team calendar sharing in Microsoft 365: 2 ways
As a Microsoft 365 user, you know that your subscription gives you access to an extensive collection of apps. Because Microsoft 365 includes so many apps, you have more than one option for team calendar sharing. For simplicity’s sake, we’ve chosen our top two methods:
- Through Microsoft Outlook
- Through Microsoft Teams and SharePoint
Let’s start with Microsoft Outlook!
Method 1: How to share your Outlook calendar
Sharing your calendar in Outlook is an ideal option if you’re looking to share with individuals, whether they’re an internal or external user. As long as external calendar sharing is enabled for your organization in the admin center, you should be able to use this method to share your Outlook calendar with anyone, even if they’re a Gmail user. (Note: This is different from creating a Microsoft 365 group in Outlook, which provides a shared mailbox and a shared calendar.)
The Outlook client has apps for Windows, Mac, iOS, Android, and web. First step: Determine which version of Outlook you have, then find the appropriate instructions below.
Windows
- Open Outlook, and select the calendar view by clicking the calendar icon in the Navigation Pane along the left side of the window.
- In the Home tab, select Share calendar.
- In the drop-down menu, select which calendar you’d like to share. The Calendar Properties dialog box will open up, displaying the current permissions settings.
- Click Add to open the Add Users dialog box, where you can then select which person (or people) you want to share your calendar with. If their name isn’t in the list, simply enter their email address. Press OK.
- Choose from the various permission levels to customize how much you’d like to share with the other person. You can select different permission levels for each user who can see your calendar. Press OK.
That’s it! Your colleague will receive a sharing invitation in their inbox, with instructions to accept and view your calendar.
Mac
- Open Outlook, and select the calendar view by clicking the calendar icon in the Navigation Pane along the bottom of the window.
- Right-click your name, then select Sharing Permissions from the drop-down menu. The Calendar Properties dialog box will open up.
- Click the plus (+) sign to search for or enter the email address of the person you’d like to share your calendar with.
- Use the Permissions drop-down menu to select the level of details the other person has access to. Click Add.
- Select Done.
That’s it! Your colleague will receive a sharing invitation in their inbox, with instructions to accept and view your calendar.
iOS or Android
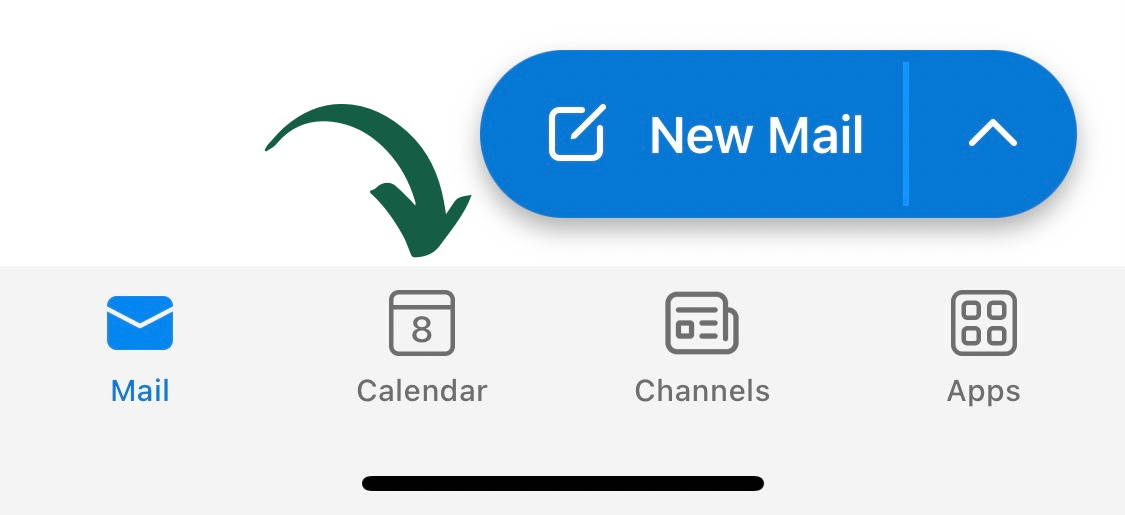
- Open the Outlook app, and select the calendar view by tapping the calendar icon at the bottom of your screen.
- Open your calendar list by tapping your icon in the top-left corner, or by swiping right on the left side of the screen.

- Under My Calendars, find the calendar you’d like to share. Then, tap the gear icon next to it.
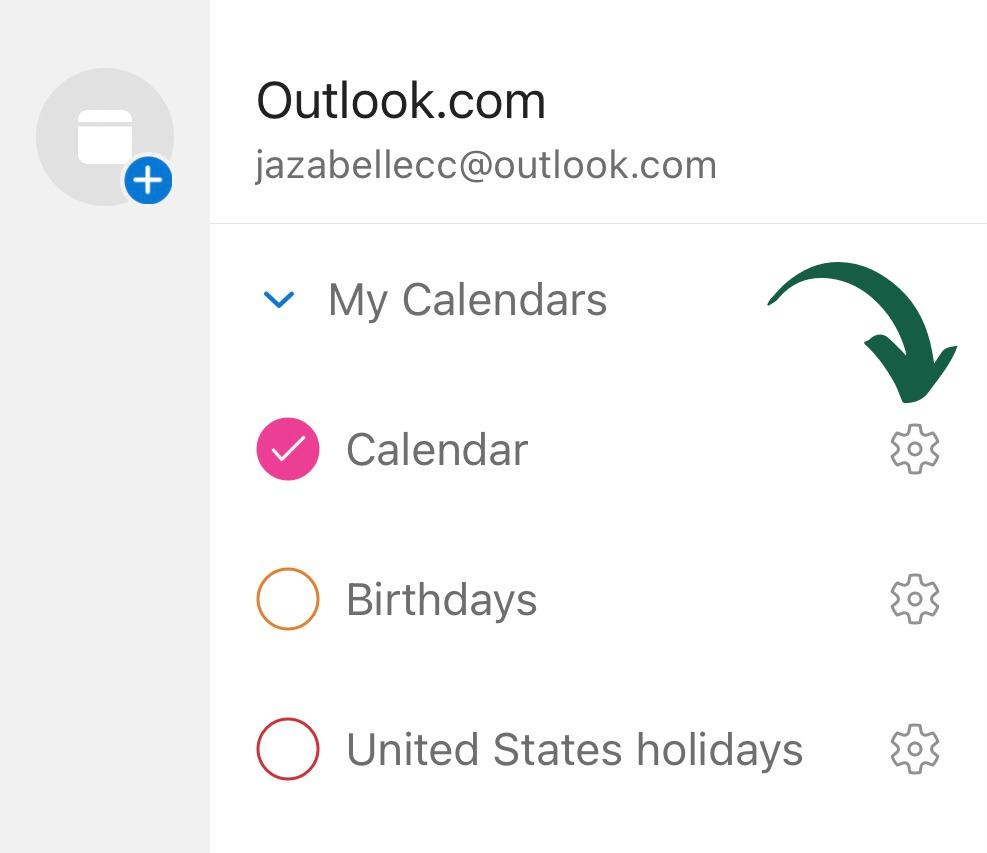
- Tap + Add People.
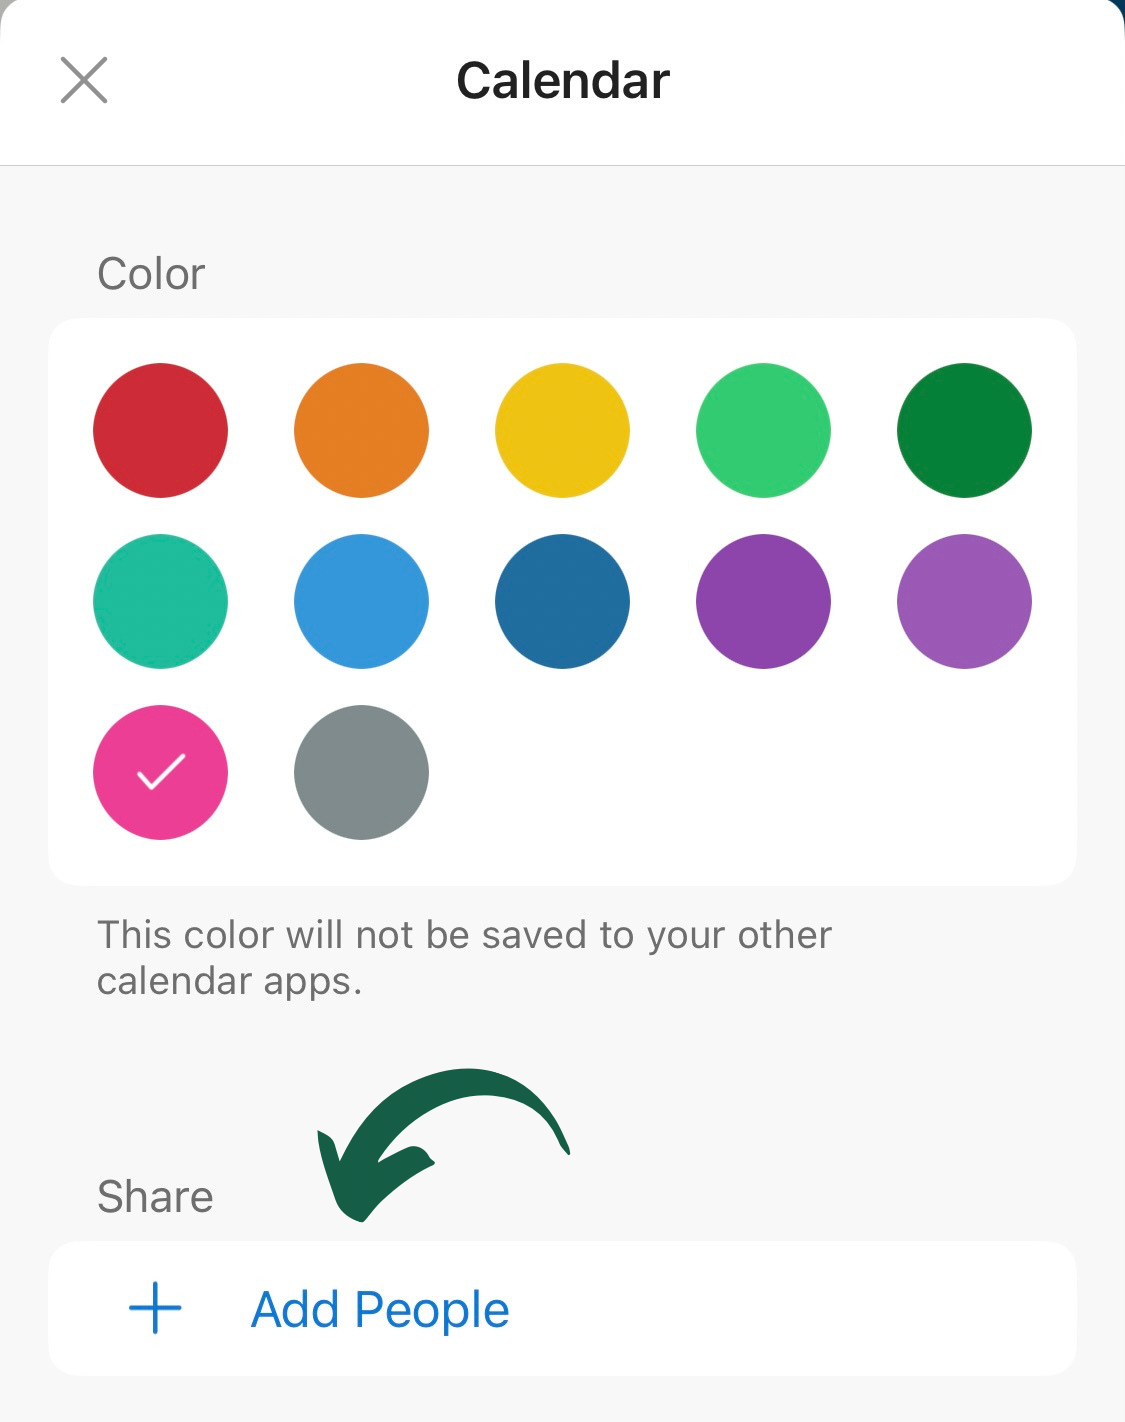
- Type the name or email address of the person you’d like to share your calendar with. Feel free to enter more than one person. When you’re done adding users, tap the arrow.

- You’ll then see a list of all users with access to your calendar. Tap the arrow next to each user to customize the permissions for that person.
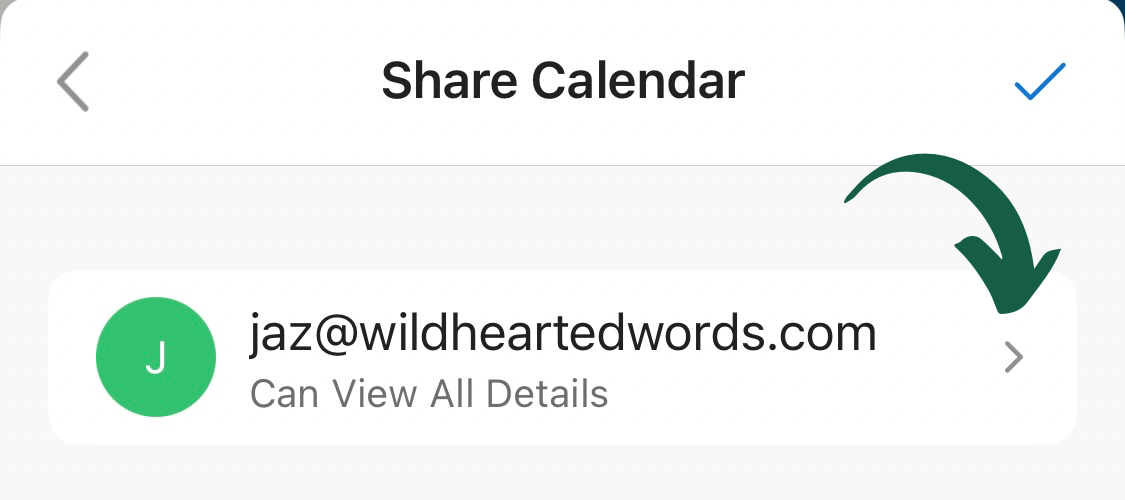
- Customize the permission levels for each user, then tap the back arrow to go back to the previous screen.
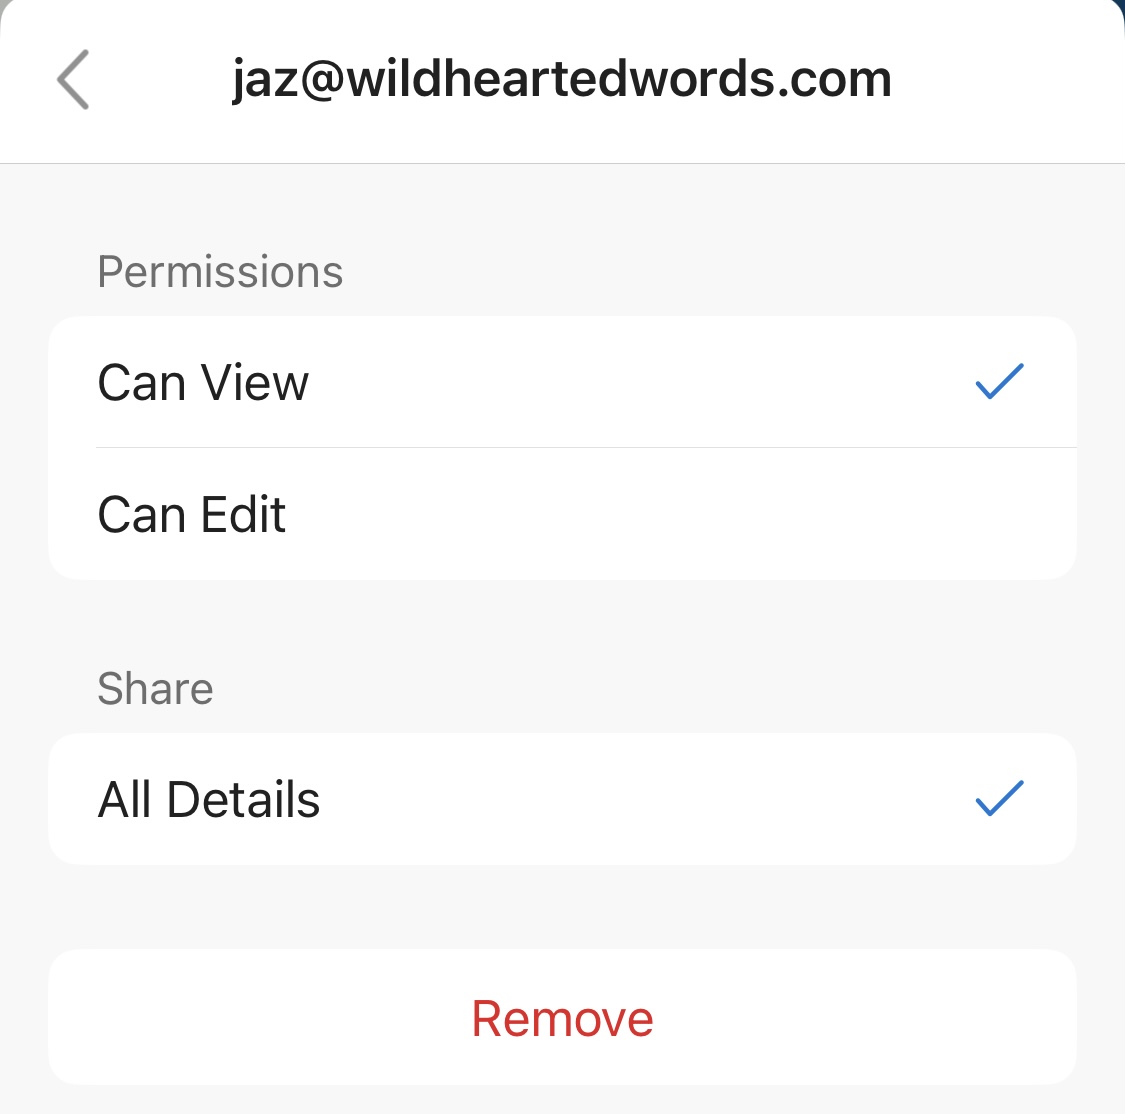
- Tap the checkmark icon to save your changes, and you’re all set!
That’s it! Your colleague will receive a sharing invitation in their inbox, with instructions to accept and view your calendar.
Outlook on the web
Follow these steps if you either:
- Have a Microsoft 365 account and are using the Outlook web app (also known as OWA), or
- Are using Outlook.com, Microsoft’s free email service
- Open Outlook, and select the calendar view by clicking the calendar icon in the Navigation Pane along the left side of the window.
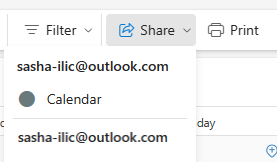
- In the Home tab, select Share. If you have a Microsoft Exchange account (either through Exchange Server or Exchange Online), your button will say Share calendar.

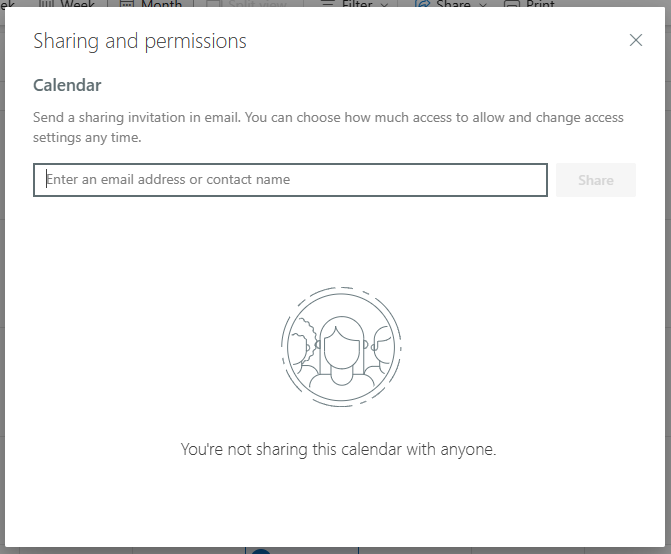
- In the drop-down menu, select which calendar you’d like to share. The Sharing and permissions dialog box will open up.

- Enter the name or email address of the person you’d like to share your calendar with. Feel free to enter multiple people.
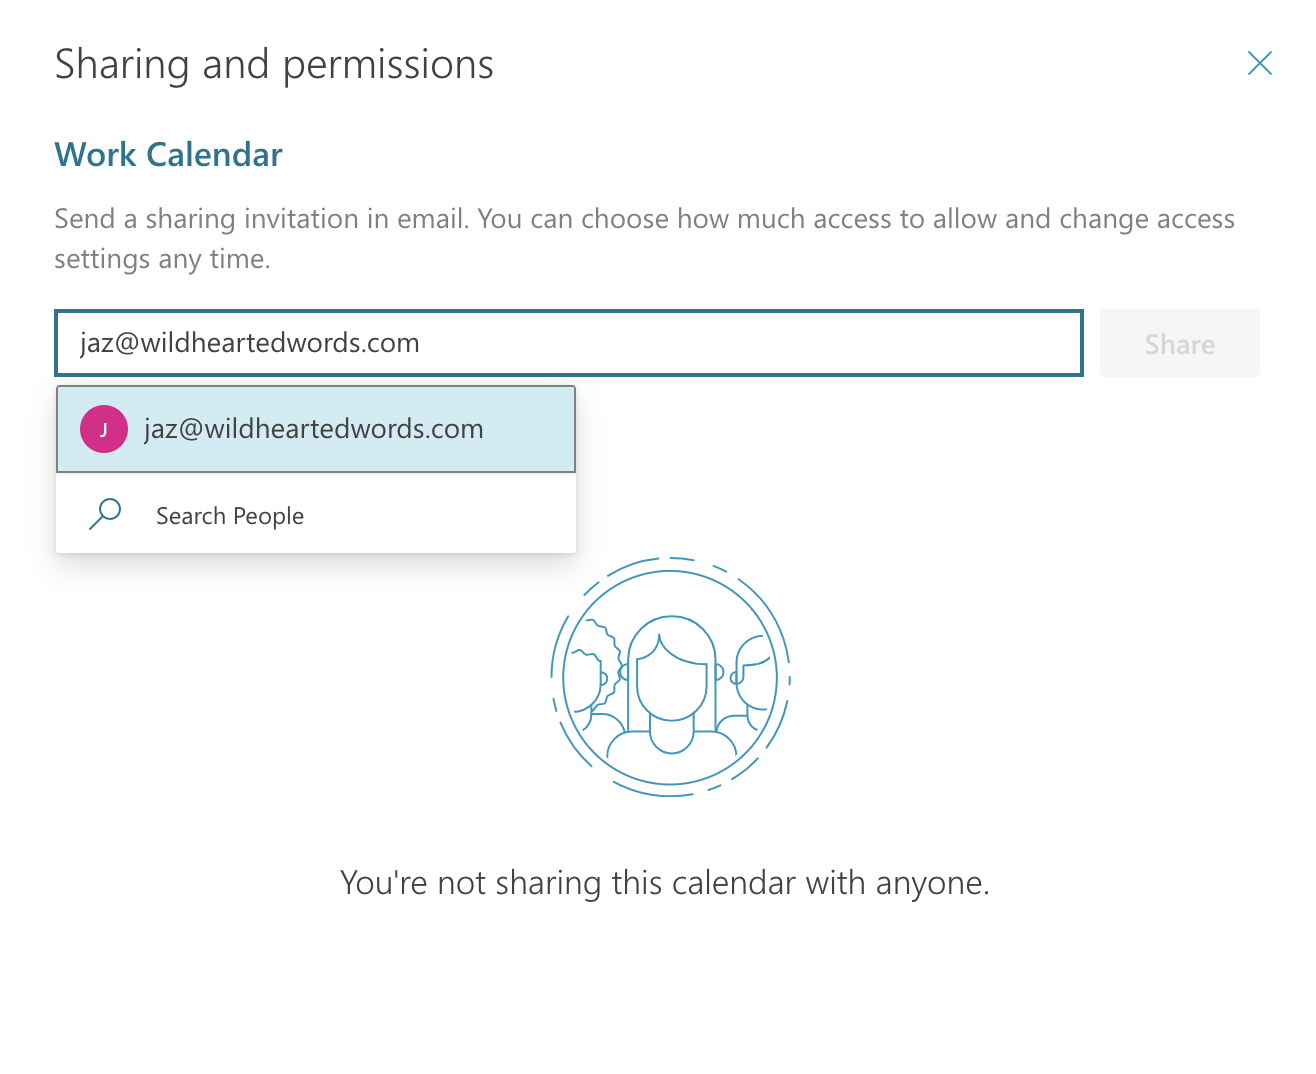
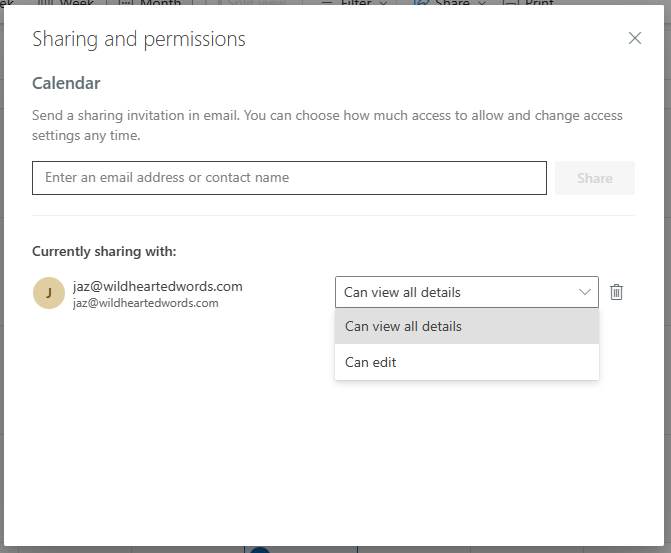
- Use the drop-down menu next to each name to customize how much you’d like to share with the other person. Click Share.
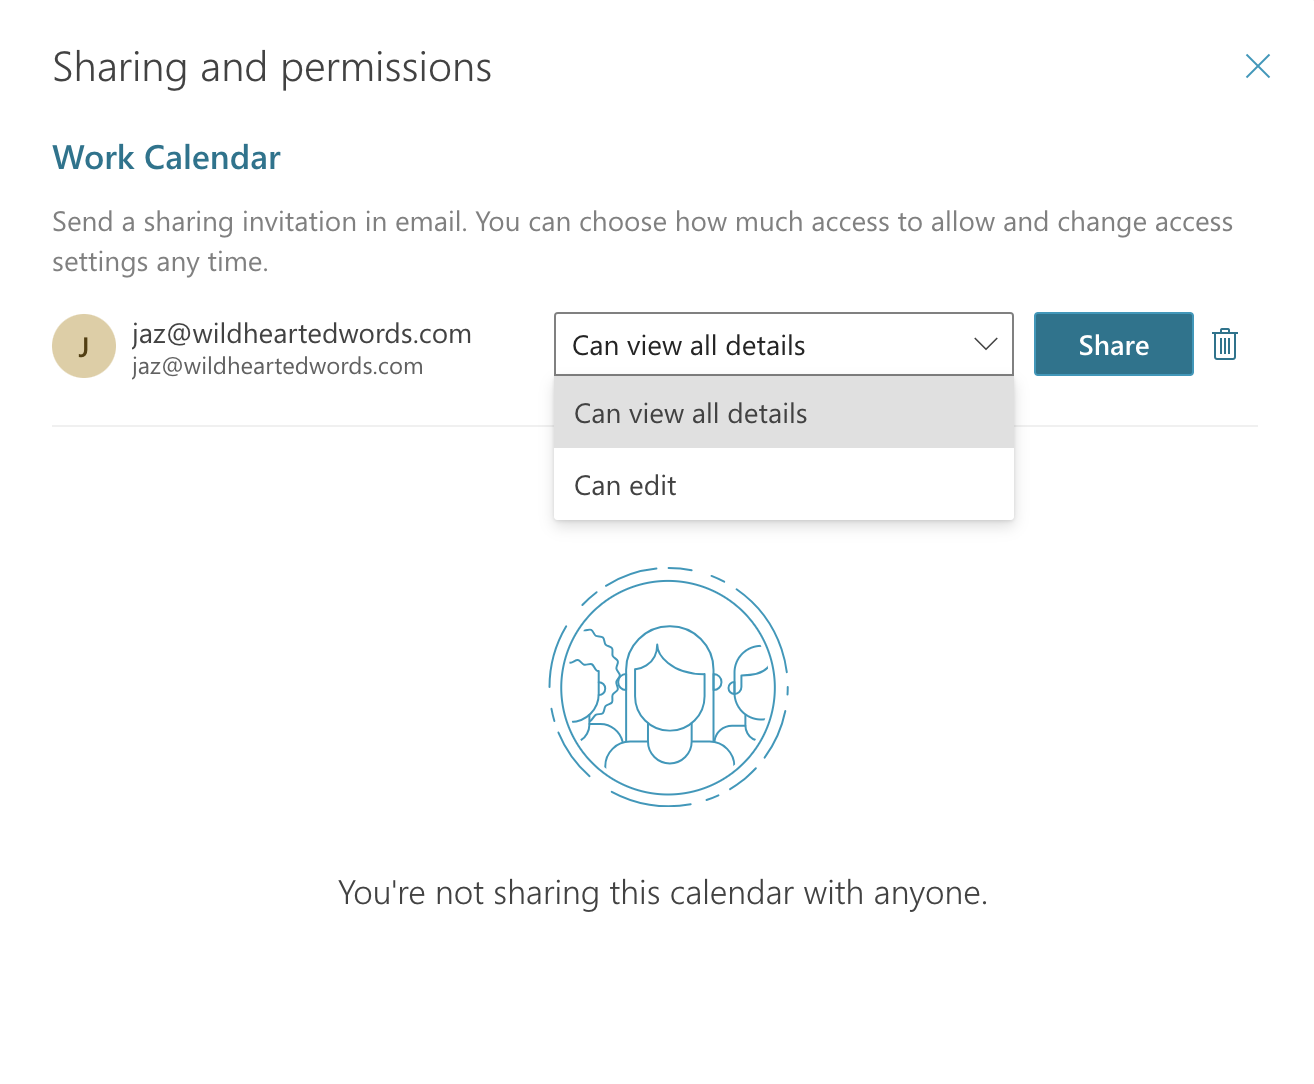
That’s it! Your colleague will receive a sharing invitation in their inbox, with instructions to accept and view your calendar.
How to view other people’s calendars in Microsoft Outlook
To access another person’s calendar in Outlook, they need to have sent you a sharing invitation, which you’ll receive in your inbox. Once you’ve accepted the invitation, you should then be able to view their calendar according to the calendar permissions granted to you.
Method 2: How to create a shared calendar in Microsoft Teams
Your second option to create a shared calendar in Microsoft 365 is through Microsoft Teams. This method is ideal if you have a specific team (or Microsoft 365 group) in Teams that needs access to a group calendar. Note that this method also involves using the SharePoint app.
- Open Microsoft Teams in your browser
- Click on Teams in the navigation pane on the left
- Click into the specific team you’d like to create the shared calendar for
- Click the Files tab
- Click Open in SharePoint
- Click Home
- Click + New > App
- Select Calendar
- Enter a name for your shared calendar, then click Create. You’ll then see your Calendar app, alongside the rest of your site contents.
- Click Calendar to open the web page for your new calendar
- In the address bar, copy the URL to your clipboard
- Head back to your Team’s page in Microsoft Teams
- Hit the + to add a new tab
- Select Website
- Paste the URL into the URL field
- Press Save
You’re all set — now, your team will be able to view and manage your shared calendar via Microsoft Teams.
Supercharge your team’s time management with Clockwise
When it comes to effective teamwork, calendar sharing is just one piece of the puzzle. With Clockwise, you get an easy-to-use calendar sharing experience, plus other tools to get your team running like clockwork.
Here’s what Clockwise can do for you and your team:
- Makes deep work possible
Did you know that the average worker is interrupted every 11 minutes? With Clockwise, you and your teammates can finally find your flow thanks to automatically scheduled Focus Time. Clockwise creates more Focus Time in your schedule by rearranging your existing meetings to open up long blocks of free time, perfect for focused work.
- Optimizes meeting times for everyone involved
Struggling to find a time that works for everyone? Clockwise analyzes attendees’ calendars to instantly surface the ideal time, taking into consideration a variety of factors including Focus Time goals, lunch preferences, meeting hours, and more.
- Integrates with Microsoft Outlook
Whereas other scheduling apps force you to create another calendar, Clockwise works on top of your existing calendar app for a less complicated, more seamless experience.
Ready to try it out? Get started with Clockwise for free today!
Read next: AI Scheduling for Outlook Calendar

.webp)
.gif)


.png)